Black Forest Flourless Brownie Cookies
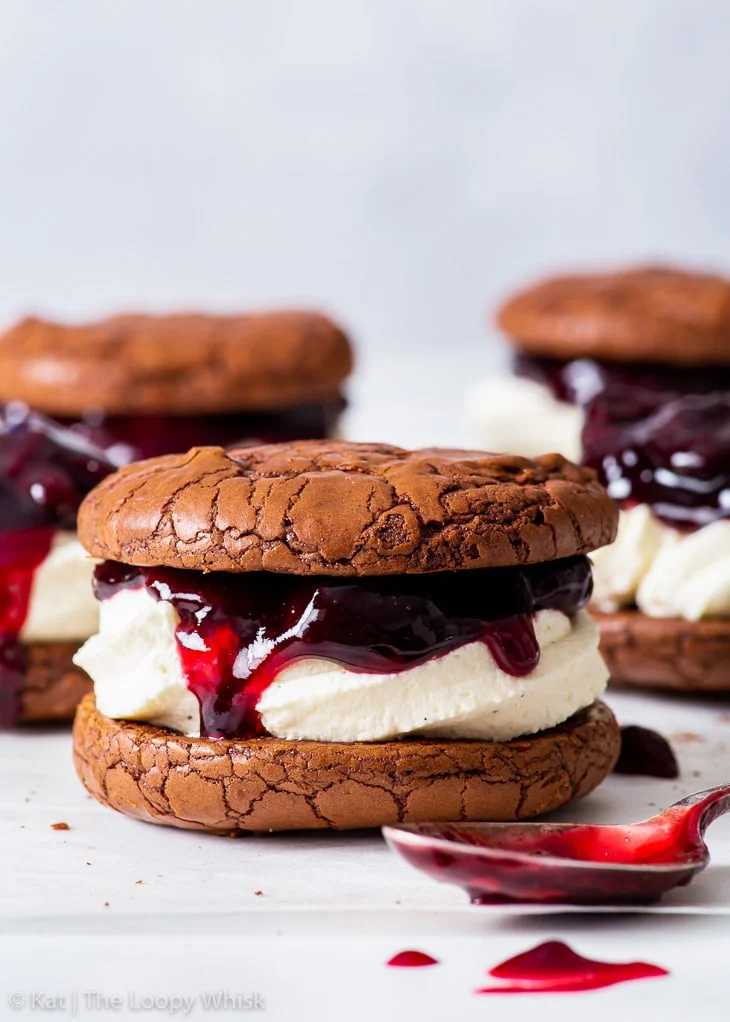
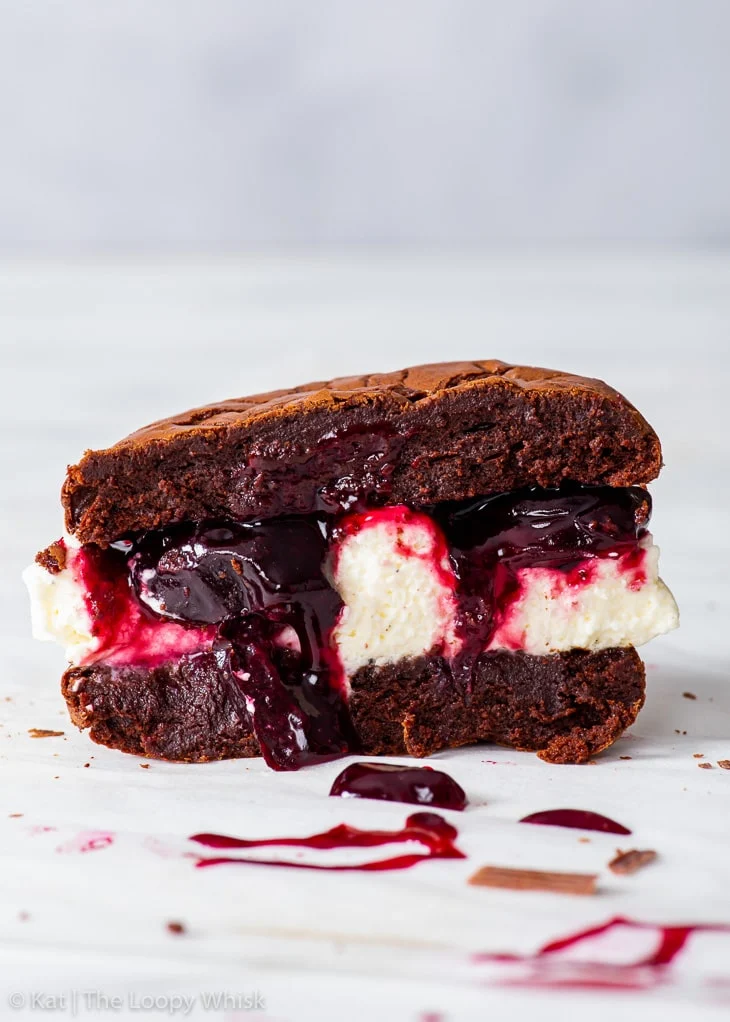
These incredible Black Forest flourless brownie cookies capture all the opulence and deliciousness of a Black Forest gateau – but are also much easier and quicker to make and assemble. With perfectly fudgy flourless chocolate cookies, a fluffy vanilla whipped cream and luscious, syrupy cherry filling, these gluten free cookies are the very definition of luxurious decadence.
These are hands down one of the best things I’ve ever tasted. The flavours and textures complement each other perfectly, to give a truly spectacular and unforgettable dessert.


Course Dessert
Cuisine Gluten Free
Prep Time 45minutes minutes
Cook Time 8minutes minutes
Chill Time 36minutes minutes
Total Time 1hour hour 29minutes minutes
Servings 8 sandwich cookies
Ingredients
Cherry filling:
- 300 g (10 ½ oz) halved pitted cherries (Either fresh or frozen, both will work well.)
- 50 g (¼ cup) caster/superfine or granulated sugar
- 1 ½ tbsp lemon juice
- 8 g (1 tbsp) cornstarch (US)/cornflour (UK)
Flourless brownie cookies:
- 150 g (5 ¼ oz) dark chocolate (60-70% cocoa solids), chopped
- 70 g (½ stick + 1 tbsp) unsalted butter
- 150 g (¾ cup) caster/superfine or granulated sugar
- 2 US large/UK medium eggs, room temperature
- 30 g (⅓ cup) Dutch processed cocoa powder
- ¼ tsp salt
Vanilla whipped cream:
- 230 g (1 cup) double or heavy cream, cold from the fridge
- 30-40 g (¼-⅓ cup) powdered/icing sugar (Depending on how sweet you want the whipped cream to be.)
- 1 tsp vanilla bean paste (or 2 tsp vanilla extract)
Instructions
Cherry filling:
- In a large saucepan, combine the halved pitted cherries, sugar and lemon juice. Cook over medium-high heat with occasional stirring until the cherries have softened and released their juices.
- Spoon out a few tablespoons of the juices and mix them together with cornstarch to form a slurry. Make sure that there are no clumps of cornstarch in the slurry mixture.
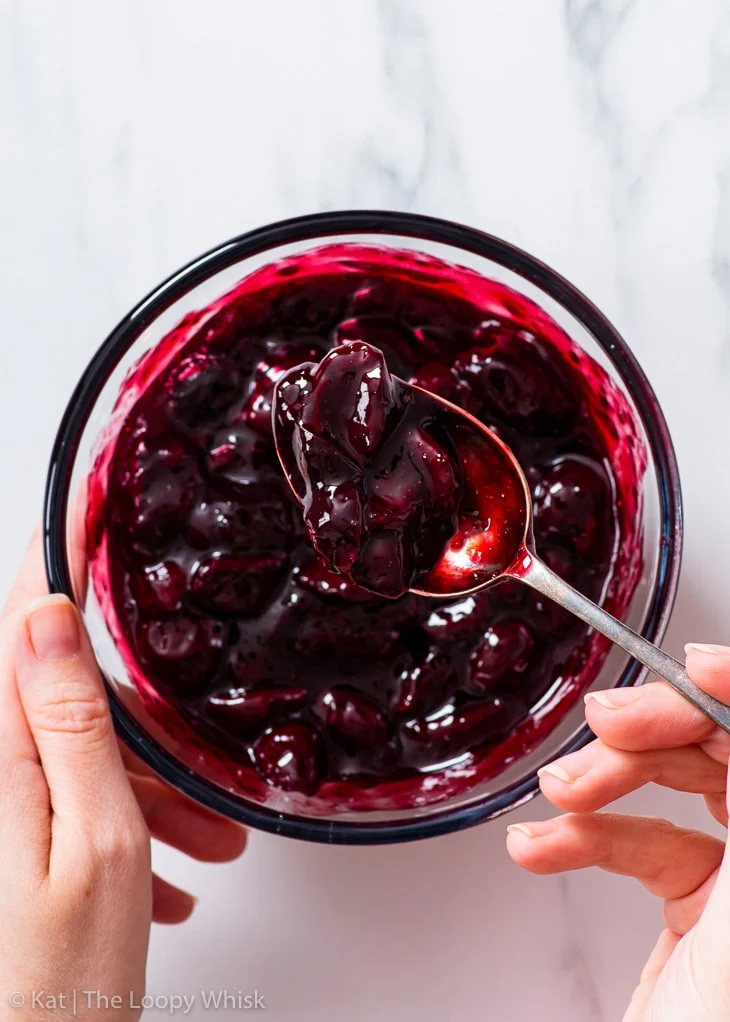
- Return the cornstarch slurry to the cherry filling in the saucepan and cook, with frequent stirring, on medium-high heat until the mixture comes to a boil. Once it’s come to a boil, cook it for about a minute more with constant stirring.Tip: The cornstarch will only reach its full thickening potential if the mixture reaches the boiling point and stays there for a minute or two.
- Spoon out some of the thickened juices onto a plate and place it into the fridge. Check the consistency of the cooled juices.
- If you’re happy with the consistency: Allow the cherry filling to cool completely to room temperature. Ideally, cool it quickly in a cool water bath (just fill a large bowl with cold water and place the saucepan into it). If you want the cooling to be even quicker, you can put some ice cubes into the water.Tip: The cold water bath will cool the filling down very quickly and will prevent the cherries from softening further in what would otherwise have been a hot filling that would need some time to fully cool down.
- If you want the cherry filling to be thicker: Pass the filling through a sieve, transfer the cherries into a bowl and return the thickened juices to the saucepan.Cook them further until they’ve reached the desired consistency. Cool them completely, then return them to the cherries, and mix well until fully combined.
- Chill the cherry filling in the fridge for at least 30 minutes or until needed.
Flourless brownie cookies:
- Adjust the oven rack to the middle position, pre-heat the oven to 350ºF (180ºC) and line two large baking sheets with parchment/baking paper.Tip: It’s best to scoop all the cookies onto the lined baking sheets straight away, and this recipe makes 16 individual cookies, which should fit comfortably onto two large baking sheets.
- In a heat-proof bowl (either in the microwave or on the stove over a pot of simmering water), melt the chocolate and butter together until smooth and glossy. Set aside to cool until warm.
- Using either a stand mixer fitted with the whisk attachment or a hand mixer fitted with the double beaters, whisk the sugar and eggs together until pale, very fluffy and about tripled in volume.Tip: This is known as the “ribbon stage” – when you lift the whisk out of the mixture, the batter should fall in thick trails, and leave a “ribbon” on top of the mixture for a second or two before it disappears into the bulk.
- Pour the warm chocolate mixture into the whisked egg mixture, and whisk until combined.
- Sift in the cocoa powder and salt, and whisk until you get a smooth, glossy batter – it will be quite runny.
- Chill the batter in the fridge for 6-8 minutes or until slightly thickened but still fairly loose, like a thick brownie batter.Tip: This short chilling time prevents the cookies from spreading out too much in the oven.
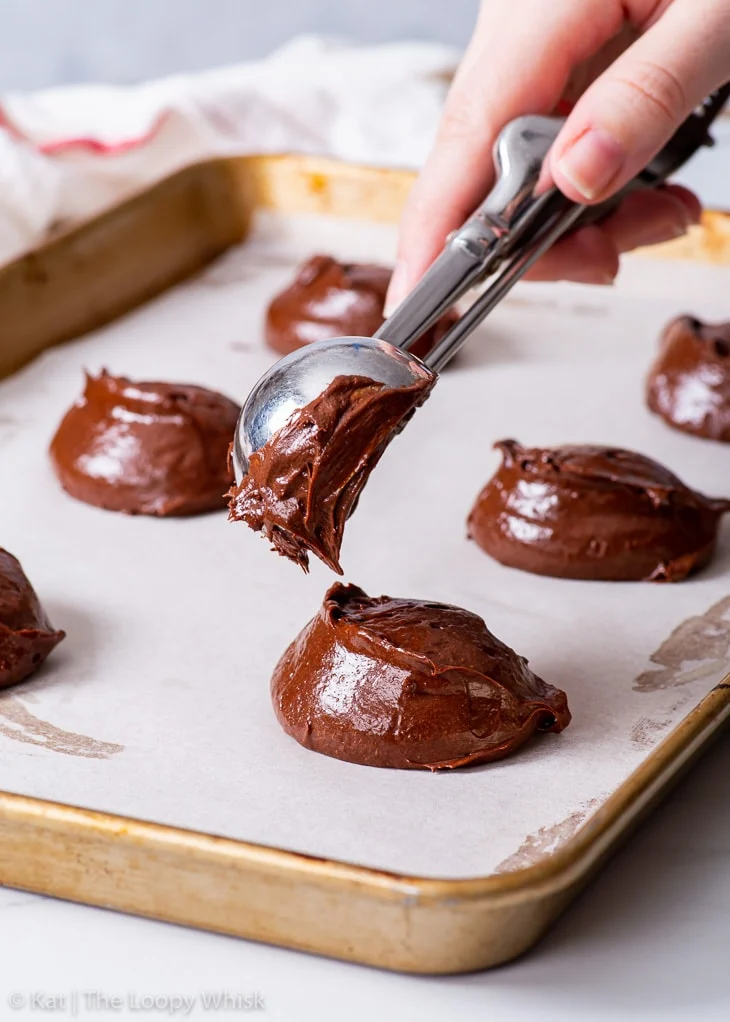
- Use a “2 tablespoon” ice cream or cookie scoop to portion out the cookies. Make sure to leave enough space (at least 1 ½ inches/4cm) between them as they will spread out slightly during baking.Scoop out all the cookies at once. You should get 16 cookies, which should easily fit onto the two lined baking sheets.
- Bake at 350ºF (180ºC) for 8-9 minutes until slightly puffed up. They will have a glossy, cracked crust. Immediately out of the oven, they will be fairly puffed up into rounded mounds, but they will settle and collapse during cooling.Directly out of the oven, while they’re still very hot, you can use a round cookie cutter to nudge or scoot the cookies into a more regular round shape.
- Allow to cool on the baking sheet for at least 10 minutes before transferring them onto a wire rack to cool completely to room temperature.
Vanilla whipped cream:
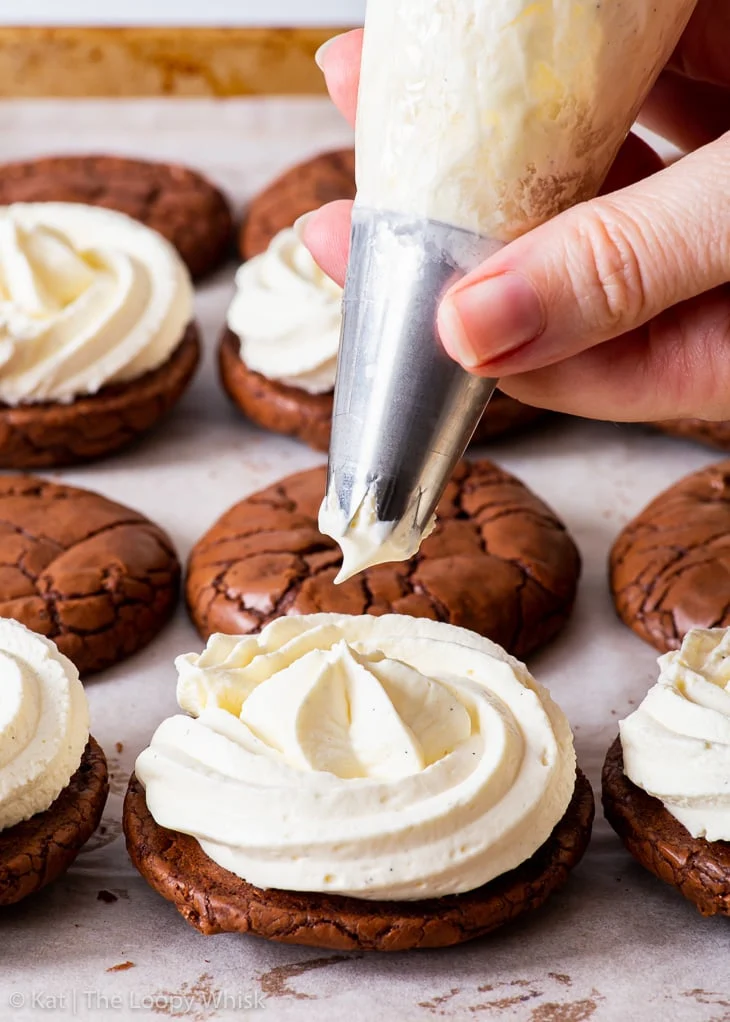
- In a large bowl, whip the cream, powdered/icing sugar and vanilla to very soft peaks.Tip: I like to do this by hand using a large balloon whisk (as it allows me the greatest amount of control over the consistency of the cream), but you can also use a stand mixer fitted with the whisk attachment or a hand mixer fitted with the double beaters.
- Transfer the whipped cream into a piping bag fitted with a large open star nozzle.
Assembling the Black Forest cookies:
- Turn one (completely cooled) cookie upside down, so that its bottom faces upwards.
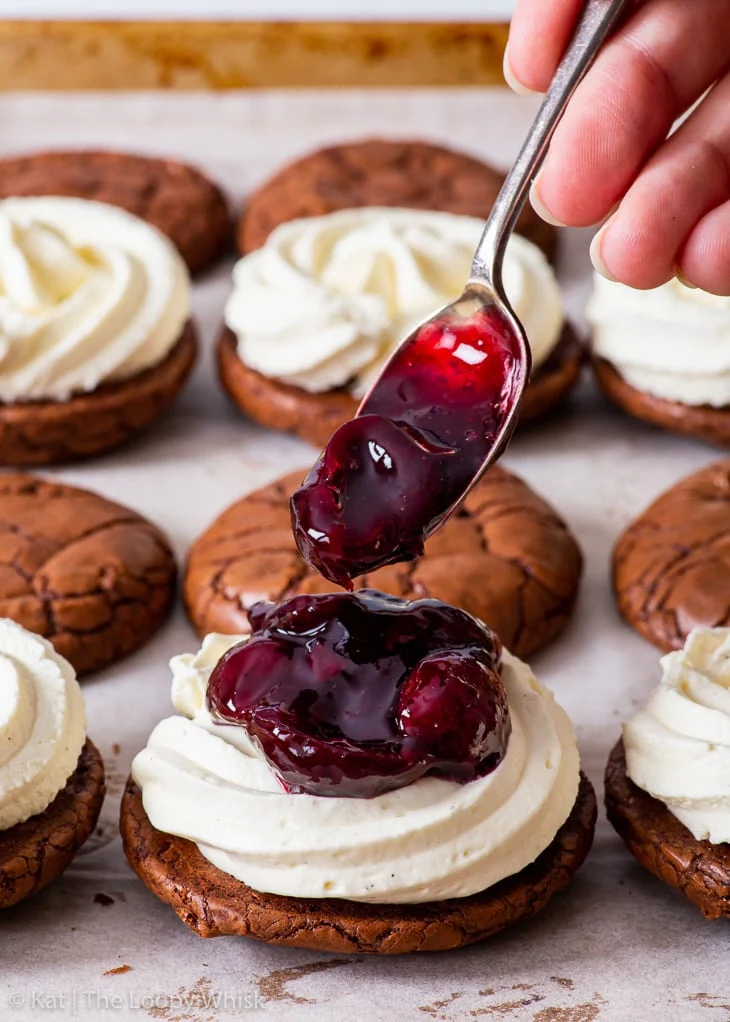
- Pipe a generous layer of whipped cream on top of the cookie.
- Spoon the chilled cherry filling over the whipped cream.
- Top it with another cookie.
Serving:
- Save any leftover cream or cherry filling to serve with the cookies.
- While these are technically meant to be sandwich cookies, you could also serve them without the top cookie. (This is actually how I prefer to eat them!) This gives a proportion of cookie to cream to cherries that is pretty much 1:1:1, which allows all the flavours and textures to shine equally.However, if you want a more intensely chocolatey dessert, just serve them as sandwich cookies with the top cookie included.
- Because of the amount of fillings, I definitely recommend eating these with a fork.
Storage:
- The Black Forest flourless brownie cookies keep well in an airtight container in the fridge for about 3-4 days.

Author Kat | The Loopy Whisk